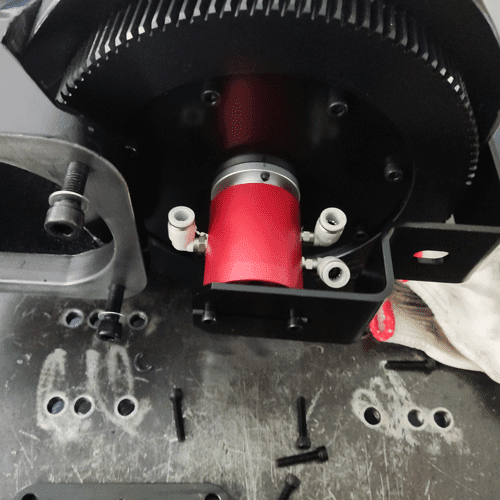
Installing a rotary joint is a critical task in industrial automation, ensuring seamless fluid transfer in rotating machinery like CNC systems or laser cutting equipment. A properly installed rotary joint minimizes leaks, reduces downtime, and extends equipment life. As a leading rotary joint manufacturer, Begapunk recommends following precise steps to avoid common pitfalls. This guide covers pre-installation checks, the installation process, and post-installation testing. Whether you’re working with a pneumatic rotary joint for air or a hydraulic rotary joint for oil, these tips apply. Let’s dive in to help you get your rotary joint up and running smoothly.

Step 1: Pre-Installation Checks – Inspect the Rotary Joint Before Mounting
Before mounting the rotary joint, thorough inspection is essential to prevent issues like misalignment or failure. Start by comparing the rotary joint to the technical drawings provided. Verify the thread specifications, such as M20x1.5 or NPT 1/2″, and measure key installation dimensions like shaft diameter and flange spacing. This ensures the rotary joint fits your system perfectly.Next, test the rotation. Spin the rotary joint by hand to check for flexibility— it should turn smoothly without resistance. Any stiffness could indicate internal damage or manufacturing defects. Also, inspect visible parts for rust, corrosion, or irregularities. For stainless steel rotary joints like ours at Begapunk, look for anodized surfaces. If rust is present, clean it with a soft brush and anti-corrosive agent, or replace the rotary joint if severe. Skipping this step can lead to leaks in high-pressure applications, compromising the entire rotary joint system.Remember, a high-quality rotary joint from a reliable source reduces these risks. Our rotary joints are pre-tested for flexibility and corrosion resistance, supporting up to 30MPa pressure in demanding environments.
Step 2: The Installation Process – Ensure Proper Alignment for Smooth Operation
Once inspections are complete, proceed to install the rotary joint. The key to a successful installation is maintaining coaxiality—the alignment between the rotary joint‘s axis and the machine’s rotating shaft. Aim for a coaxiality tolerance of 0.05mm or less. Misalignment beyond this can cause vibration, wear on seals, or premature failure of the rotary joint.Begin by securing the stationary part of the rotary joint to the supply line using the correct threads. Use a torque wrench to tighten connections according to specifications—over-tightening can damage the rotary joint‘s housing. Then, attach the rotating shaft, ensuring the rotary joint is level and centered. Use a dial indicator to measure coaxiality; adjust shims or brackets as needed until within 0.05mm.For multi-channel rotary joints like our 3-inlet 3-outlet model, align each port carefully to avoid cross-flow. In laser cutting setups, this precision ensures smooth air delivery for clamping. A well-aligned rotary joint runs efficiently, reducing energy loss and extending lifespan to over 500,000 cycles.
Step 3: Post-Installation Testing – Gradually Increase Pressure to Avoid Leaks
After installation, testing is crucial to verify the rotary joint‘s integrity. Start with a low-pressure test to detect any issues early. Slowly increase pressure while monitoring for leaks—begin at 1MPa and ramp up to the operating level (e.g., 30MPa for hydraulic rotary joints). Sudden high pressure can cause explosive leaks or seal blowouts, so ramp gradually over 5-10 minutes.Run the rotary joint at low speed (under 100 RPM) during testing, checking for unusual noise, vibration, or fluid escape. Use pressure gauges and thermal sensors to ensure temperature stays within -20°C to 100°C. In dusty environments, test for dust ingress by inspecting seals after a short run.If leaks occur, stop immediately and recheck alignment or seals. Begapunk’s rotary joints are designed for easy testing, with PTFE seals that withstand high pressures without failure. This step can prevent 90% of installation-related accidents.
Why Proper Installation Matters for Your Rotary Joint
A correctly installed rotary joint not only ensures safety but also optimizes performance. Poor installation leads to leaks, increased friction, and downtime costing thousands. With Begapunk’s rotary joints, our stainless steel designs and multi-channel options make installation straightforward, supporting applications like laser tube cutting with zero tolerance for error.Looking to install a rotary joint in your setup? Contact us for custom advice and our full installation manual.By Cao Guangcheng, Founder of Begapunk. With expertise in rotary joint engineering, we’ve helped OEMs worldwide achieve seamless operations.
